The fastest way to password protect your entire WordPress site is the free Password Protected plugin — install, activate, set a password, done in under five minutes. But that’s only the right answer for some situations. For staging sites, dev environments, or anything that needs serious privacy, server-level HTTP authentication via .htaccess is far more secure.
This guide covers five different methods to password protect your whole WordPress site, when to use each, and the security pitfalls most tutorials skip. After cleaning up over 4,500 hacked WordPress sites, I’ve seen plenty of “password-protected” sites where the password protection didn’t actually protect anything because the REST API, sitemap, or RSS feed was still wide open. We’ll fix that here.
📌 TL;DR — Pick Your Method
- For client review / soft launch sites: Password Protected plugin (5 minutes)
- For staging or development sites: HTTP authentication via
.htaccess(most secure) - For “coming soon” pages with a public-facing message: SeedProd or similar
- For managed hosting users (Kinsta, WP Engine, etc.): Use the host’s built-in tool
- For multi-user private sites: A membership plugin like Members or MemberPress
Why Password Protect Your Entire WordPress Site?
Before picking a method, be clear on why you need this — because the right method depends entirely on your use case. The most common reasons people want sitewide password protection:
- Staging or development sites — you don’t want Google indexing the work-in-progress, and you definitely don’t want strangers seeing test data.
- Pre-launch / coming soon sites — the domain is live but the site isn’t ready for the public.
- Client review portals — you’re showing work to a client and want a simple barrier so it doesn’t leak.
- Internal company intranets — employee resources, internal docs, or HR pages.
- Private blogs or family sites — content you want to share with specific people, not the world.
- Membership / paid content — though for this, a real membership plugin is usually a better fit than basic password protection.
Each of these has slightly different security needs. A staging site holding production data needs proper server-level protection. A “coming soon” page just needs to keep curious visitors out. Pick the method that matches the threat level.
5 Methods to Password Protect Your Entire WordPress Site
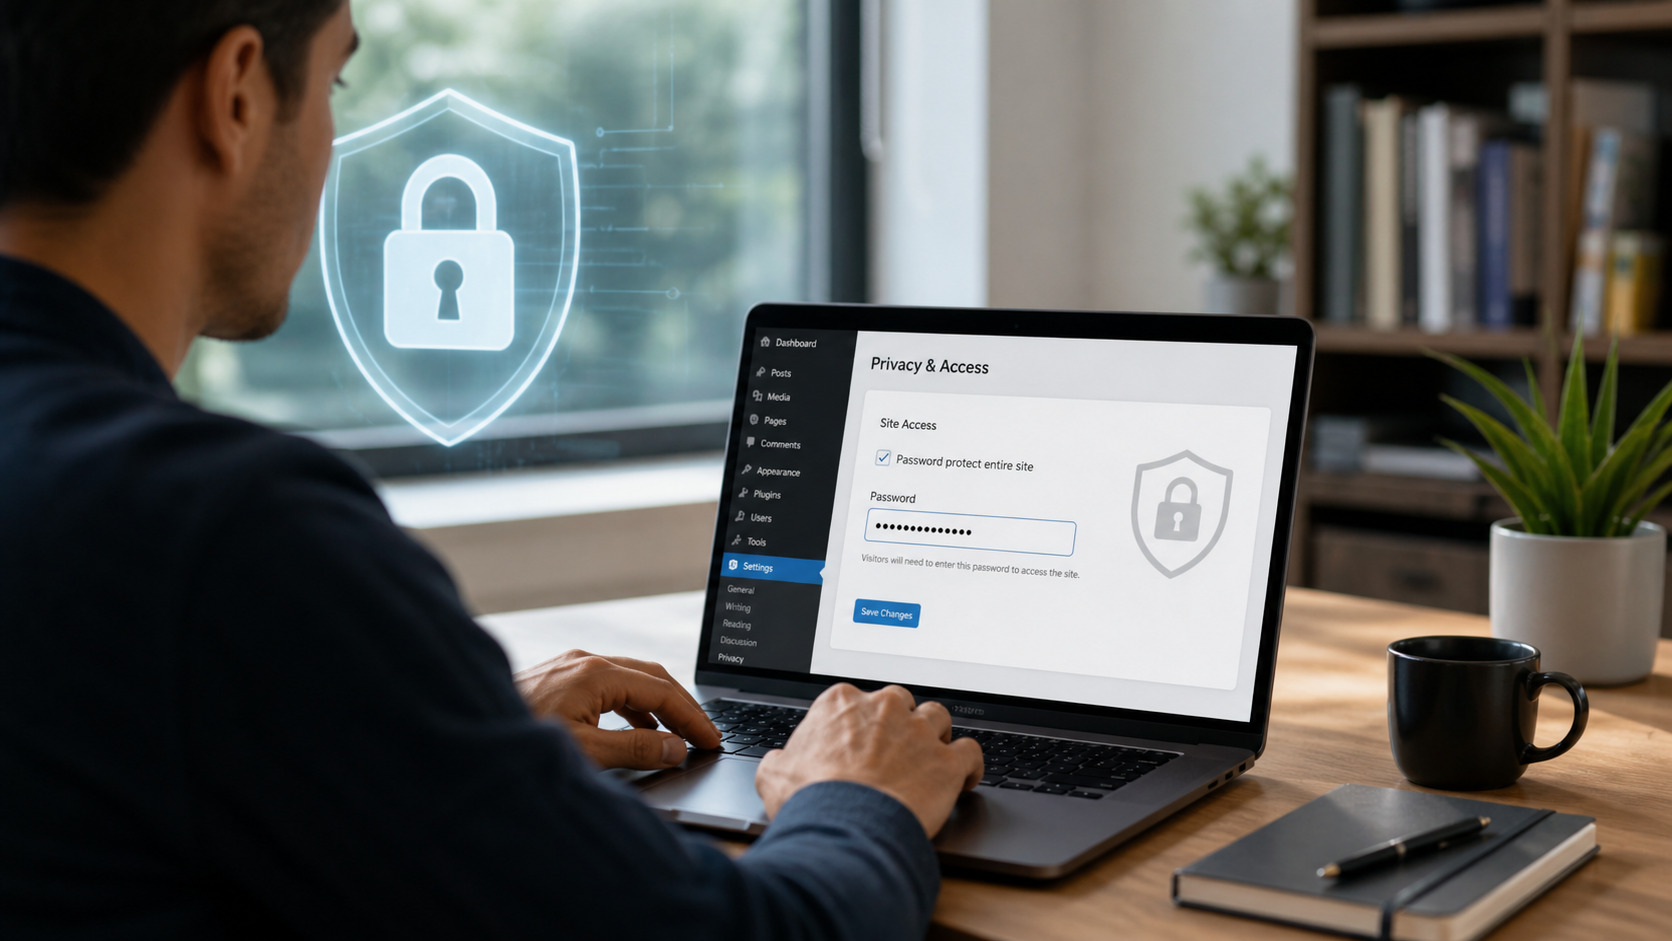
Method 1: Password Protected Plugin (Easiest, Recommended for Most Users)
This is what 90% of users actually need. The free Password Protected plugin (by WPExperts, available at wordpress.org/plugins/password-protected) locks your entire site behind a single password screen.
Step-by-step setup:
- Log into your WordPress admin dashboard.
- Go to Plugins → Add New.
- Search for “Password Protected” by WPExperts.
- Click Install Now, then Activate.
- Go to Settings → Password Protected.
- Check the Password Protected Status box to enable.
- Enter and confirm a strong password in the New Password field.
- Optionally check Allow Administrators so you don’t have to enter the password while logged in.
- Click Save Changes.
Pros: Fast, free, no technical knowledge required. Works on any hosting environment.
Cons: Cookie-based, which conflicts with some caching plugins. The REST API and sitemap may still leak content unless you configure them separately (we’ll cover this in the security section below). Not appropriate for sites holding genuinely sensitive data.
Best for: Pre-launch sites, client review portals, casual privacy needs.
Method 2: HTTP Authentication via .htaccess (Most Secure)
This is the method I recommend for staging sites, dev environments, or anywhere you need real protection. HTTP authentication blocks access at the web server level — before WordPress even loads. That means it also blocks your REST API, sitemap, RSS feed, and every other endpoint without you having to think about it.
Step-by-step setup (Apache servers):
1. Generate a password hash. You need an encrypted version of your password to put in a special .htpasswd file. The easiest way: use a free online .htpasswd generator (search “htpasswd generator”), or run this command if you have SSH access:
htpasswd -c /home/your-username/.htpasswd your-chosen-usernameThis creates a .htpasswd file in the path you specify. The file will contain one line that looks something like admin:$apr1$abc123...
2. Place the .htpasswd file outside your public directory. Critical: if you put it inside /public_html/, anyone could potentially download it. Put it in your home directory or one level above the web root.
3. Add this to your .htaccess file (in your WordPress root, before the WordPress block):
AuthType Basic
AuthName "Restricted Site"
AuthUserFile /home/your-username/.htpasswd
Require valid-user

# Allow admin-ajax.php for plugin/theme functionality
<Files "admin-ajax.php">
    Order allow,deny
    Allow from all
    Satisfy any
</Files>
Replace /home/your-username/.htpasswd with the actual full path to your .htpasswd file.
4. Test it. Visit your site in a private/incognito window. You should get a browser-level password prompt before WordPress loads. If you don’t, double-check the file path is correct.
Pros: Strongest protection. Works at the server level, so REST API, RSS, XML-RPC, and sitemaps are all locked down automatically. No plugin overhead. Doesn’t conflict with caching.
Cons: Requires file system access (cPanel, FTP, or SSH). The browser prompt looks ugly compared to a styled login page. Not ideal for client-facing or marketing pages.
Best for: Staging sites, dev environments, internal tools, or anywhere security genuinely matters.
Method 3: Use Your Hosting Provider’s Built-In Tool
If you’re on managed WordPress hosting like Kinsta, WP Engine, Cloudways, or SiteGround, you may already have a one-click password protection tool in your hosting dashboard. These tools typically use HTTP authentication under the hood — they’re just doing the .htaccess work for you.
How to find it:
- Kinsta: MyKinsta → Sites → your site → Tools → Password Protection (htpasswd)
- WP Engine: User Portal → your environment → Utilities → Password Protect
- SiteGround: Site Tools → Security → Protected URLs
- cPanel-based hosts (Bluehost, HostGator, etc.): cPanel → Directory Privacy → select your folder
One important note: hosting-level password protection often disables CDN caching for the protected site. That’s actually a feature, not a bug — you don’t want a CDN serving cached copies of a “private” site to random visitors.
Pros: One-click setup. Same security level as the manual .htaccess method.
Cons: Only works if your host offers it. Implementation varies by host.
Best for: Anyone on managed WordPress hosting who wants .htaccess-level security without touching a config file.
Method 4: Coming Soon / Maintenance Mode Plugin
If your goal is “show a friendly coming soon page to visitors but let me work behind the scenes,” a maintenance mode plugin is a better fit than raw password protection. Popular options: SeedProd, Coming Soon Page & Maintenance Mode by SeedProd, WP Maintenance Mode, or LightStart.
These plugins replace your front-end with a single landing page (which can include a password form, an email signup, social links, etc.) while you continue working in the admin. They’re designed for marketing-style soft launches, not security.
Pros: Looks professional. Good for collecting emails before launch. Easy to customize.
Cons: Not really a security measure — primarily a presentation layer. Same caching and REST API caveats as Method 1.
Best for: Pre-launch marketing pages where you want to show something public-facing rather than a stark password prompt.
Method 5: Membership Plugin for Multi-User Private Sites
If different people need different levels of access — paying members, free subscribers, internal staff — basic password protection isn’t the right tool. Use a membership plugin like Members (free), MemberPress, Restrict Content Pro, or Paid Memberships Pro. These let you create user accounts with roles and gate content based on who’s logged in.
This is overkill for most “I just want to lock the site” situations, but the right answer if you’re running anything resembling a paid community.
Pros: Per-user accounts, granular permissions, often paid-content support.
Cons: Complex setup. Overkill for simple use cases.
Best for: Membership sites, private communities, and gated content businesses.
Which Method Should You Use? Quick Comparison
| Method | Security Level | Setup Difficulty | Best For |
|---|---|---|---|
| Password Protected plugin | Medium | Easy (5 min) | Pre-launch, client review |
| .htaccess HTTP auth | Highest | Medium (15 min) | Staging, dev, real privacy |
| Hosting provider tool | Highest | Easiest (1 min) | Managed hosting users |
| Coming soon plugin | Low–Medium | Easy (10 min) | Marketing pre-launch |
| Membership plugin | High | Complex (1–2 hrs) | Multi-user private sites |
Security Pitfalls Most Tutorials Miss
This is where most password-protection guides fall short — and where I see real problems on client sites. Plugin-based password protection blocks the front-end of your site, but WordPress has a lot of other doors. If you’re using Method 1, 4, or 5, you need to close these too:
1. The REST API can leak your “private” content
WordPress exposes content through /wp-json/wp/v2/posts, /wp-json/wp/v2/pages, and similar endpoints. Anyone who knows to visit those URLs can often read your posts and pages even with sitewide password protection enabled. The Password Protected plugin disables REST API access by default in newer versions, but always test it. Visit yoursite.com/wp-json/wp/v2/posts in a private window and confirm you get an authentication error, not a list of your content.
2. The sitemap.xml stays public
If you have an SEO plugin like Yoast or Rank Math active, your sitemap at /sitemap.xml or /sitemap_index.xml may still be accessible — exposing every URL on your “private” site. Either disable the SEO plugin temporarily, or better yet, use Method 2 (.htaccess) which blocks everything.
3. RSS feeds bypass password screens
Visiting yoursite.com/feed/ often returns your post content directly, password protection or not. Most plugin-based methods don’t address this. Server-level protection (Method 2 or 3) does.
4. Cached versions remain accessible
If you had public content indexed before enabling password protection, cached copies may still be served by Google’s cache, the Wayback Machine, or your own CDN. Clear your CDN cache and submit a removal request to Google Search Console if you’re trying to make previously public content private.
5. XML-RPC stays open
The xmlrpc.php endpoint is a common attack vector and isn’t blocked by most password-protection plugins. If you don’t actively use XML-RPC (most sites don’t), block it entirely with this rule in your .htaccess:
<Files xmlrpc.php>
    Order Deny,Allow
    Deny from all
</Files>
6. wp-login.php remains exposed to brute force
Plugin-based site protection usually leaves the WordPress login page (/wp-login.php) accessible to attackers. Even if your front-end is locked, bots can still hammer your login. I always recommend pairing site-wide password protection with login-specific hardening — see my WordPress login security guide and how to change the WordPress login URL.
The fundamental rule: plugin-based password protection blocks the front-end. Server-level protection blocks everything. Choose accordingly based on what you’re actually protecting.
How to Hide a Password-Protected Site from Google
Password-protecting a site doesn’t automatically remove it from Google. If you’re locking down a site that was previously public, or you want to be sure search engines never index it, do this:
- Enable “Discourage search engines from indexing this site” in Settings → Reading. This adds a
noindexmeta tag and updatesrobots.txt. - Manually edit your
robots.txtto addDisallow: /if you want a stronger signal. - Submit a removal request in Google Search Console under Removals → Temporary removals for any URLs already indexed.
- Clear your CDN cache so cached versions stop being served.
- If using Method 2 or 3 (HTTP auth), this happens automatically — Google’s crawlers can’t get past the password prompt.
If you’re using Method 1 (Password Protected plugin) for a previously-public site, expect Google to take 1–2 weeks to drop the cached versions completely.
How to Test That Your Password Protection Actually Works
Here’s a quick test I run on every site I lock down. Open a private/incognito browser window and try each of these URLs. You should get a password prompt or 401/403 error on every single one:
yoursite.com— homepageyoursite.com/sample-post— any individual postyoursite.com/wp-json/wp/v2/posts— REST APIyoursite.com/feed/— RSS feedyoursite.com/sitemap.xmlor/sitemap_index.xml— sitemapyoursite.com/wp-login.php— login page (should still be accessible if using a plugin, blocked if using.htaccess)yoursite.com/xmlrpc.php— should return blocked or auth required
If any of these returns content without a password prompt, your protection has a hole. With Method 2 (.htaccess), all of these get blocked at the server level. With Method 1 (plugin), you may need to manually close the leakage points listed in the Security Pitfalls section.
Troubleshooting Common Issues
“My password protection plugin keeps logging me out”
This is almost always a caching conflict. Plugins like W3 Total Cache, WP Rocket, or your host’s edge cache are caching the unprotected version of pages. Clear your cache, then go to your caching plugin settings and add the password protection cookie to the “Don’t Cache” list. The Password Protected plugin’s documentation has specific instructions for major caching plugins.
“The .htaccess method broke my admin”
Make sure you included the admin-ajax.php exception (shown in the Method 2 code block above). Without it, plugins and themes that rely on AJAX requests will break. Some sites also need to whitelist wp-cron.php if you’re using server cron.
“I’m getting a redirect loop”
Usually caused by a conflict between your password plugin and a caching layer or a CDN. Try: clear all caches → disable your caching plugin → disable Cloudflare or your CDN → test again. Re-enable one at a time to find the culprit.
“My .htpasswd file isn’t being recognized”
The most common cause is an incorrect path. The path in .htaccess must be the full server path, not a relative path. Ask your host for the absolute path to your home directory if you’re not sure. On many hosts it looks like /home/username/.htpasswd or /var/www/users/username/.htpasswd.
“I forgot the password and locked myself out”
For plugin-based methods: connect via FTP/SFTP and rename the plugin folder in /wp-content/plugins/ to deactivate it. You can then log into /wp-admin/ normally and reset.
For .htaccess methods: use FTP to download your .htaccess, remove the auth lines, and re-upload. Then regenerate your .htpasswd file with a new password.
FAQs: Password Protect Entire WordPress Site
How do I password protect an entire WordPress site?
The fastest method is to install the free Password Protected plugin from WordPress.org, activate it, go to Settings → Password Protected, enable protection, and set a password. For stronger security on staging or dev sites, use HTTP authentication via your .htaccess file or your hosting provider’s built-in password protection tool.
Can I password protect a WordPress site without a plugin?
Yes. Use HTTP authentication via .htaccess (Method 2 above), or use your hosting provider’s built-in directory protection tool. Both methods are more secure than plugin-based protection because they block access at the server level before WordPress loads.
Will password protecting my site hurt SEO?
If your site is already public and ranking, adding sitewide password protection will cause Google to drop your rankings — because Google can’t crawl a password-protected site. For sites that aren’t yet ranking (staging, pre-launch), there’s no SEO impact. If you only want to block search engines while still allowing direct visitors, just enable “Discourage search engines” in Settings → Reading instead of full password protection.
Does password protection work with caching plugins?
Plugin-based password protection often conflicts with caching because cached pages are served before the password check runs. You’ll need to add the protection cookie to your caching plugin’s exclusion list. HTTP authentication (Method 2) doesn’t have this problem because it runs before any caching.
Is the WordPress built-in “Password Protected” visibility option enough?
No — that built-in option only protects individual posts or pages, not your entire site. To lock down everything, you need one of the methods covered in this guide.
Can search engines see password-protected WordPress content?
With server-level protection (HTTP auth), no — search engines get the same password prompt as any visitor. With plugin-based protection, search engines may still access content through the REST API, RSS feeds, or sitemap unless those are also blocked. Always test with the URL list in the “How to Test” section.
How secure is password protection for sensitive data?
For genuinely sensitive data (medical records, financial info, customer PII), basic password protection is not enough. You need user accounts with proper authentication, encrypted data at rest, HTTPS everywhere, role-based access control, and ideally two-factor authentication. Single-password sitewide protection is appropriate for “keep curious people out” scenarios — not for data that would matter if leaked.
Can I password protect my WordPress admin area only?
Yes — apply the .htaccess method to just the /wp-admin/ directory instead of the whole site. This adds a second authentication layer in front of your normal WordPress login. See my guide on securing the WordPress login for details.
The Bottom Line
For most use cases, the Password Protected plugin will get you 90% of the way there in five minutes. If you’re protecting a staging site, anything with sensitive data, or you just want to do this right, use server-level HTTP authentication — either by editing .htaccess directly or by using your hosting provider’s built-in tool. Both options block access before WordPress loads, which closes the REST API, sitemap, and RSS leakage points that plugin-based methods leave open.
Whatever method you pick, run the URL test in the “How to Test” section before assuming you’re done. I’ve cleaned up a lot of “password-protected” sites where the password protection turned out to be cosmetic — the front-end was locked but the REST API was happily serving up the entire post archive to anyone who asked. Don’t let that be your site.
For a broader picture of WordPress security beyond password protection, see my guides on whether WordPress websites are secure, how to secure a WordPress site, and essential WordPress security tips. If your site has been compromised and you need help cleaning it up, I offer professional WordPress malware removal — or contact me directly for a security audit.
Leave a Reply